Saturday, December 31, 2011

Chisels & Floats

My little shop is partitioned into two rooms.  One is reserved for woodworking and the other houses my forges and all related equipment.  There will probably be a post on the forges later.  Over the years I've squirreled away quite a bit of miscellaneous high-carbon scrap steel, so when I decided that I needed a few new handtools for my saw making, I went digging.

Using the forge and my little trip hammer I whipped up two float blanks and a chisel.  All of my previous chisel making projects involved billeting and welding up different steels -doing one high carbon billet and one low carbon.  Then cutting off portions of those billets and welding the pieces together to make the chisel.  However, I didn't want to invest the hours needed for this process so I made a non-laminant 5/32" chisel from one of my high carbon scraps.  Just so it wouldn't be too plain-jane I gave it a somewhat 18th century style bolster.  Some quality time with some files, harden, temper, hard maple handle, some work with the sharpening stones and she was good to go.  This chisel has been my go-to when cleaning up the mortises for the saw backs.


The floats a bit more time since all of the teeth were filed.  I saved myself a little elbow grease and my files a little wear and tear by letting the float blanks anneal in the forge when I was done.
The first float had two cutting surfaces set on 45 degree angles to clean up and or sink the bottom of the saw back mortise deeper.  I chamfer the undersides of my sawbacks and this tool allows the back to fit down into the slot with no dead space.  Because of the angle and the narrowness of the mortise, I would need an even smaller chisel than my 5/32 if I wanted to chisel out the chamfers in the handle, but the float is a bit more fool-proof for this manuever.  The fact that it cuts the profile I want perfectly saves a lot of time that might otherwise go into paring away slivers to achieve a good fit.


Side View

Bottom View


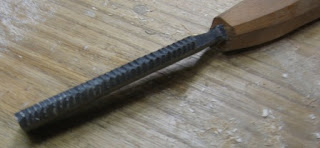
The final tool I made was a float 5/32 wide for cleaning out the mortises for the square shanks on my saw screws.  When I cut the teeth into this one I remembered a picture I saw from Kenneth Robert's book on American Planemakers.  There was a reprint of an advertisement that showed some planemaker's floats and I had noticed one that had alternating skewed teeth.  The side profile of this tool looks wicked but it is very effective.  

Skewed Tooth Float


Skewed Float on right.  From planemaker Philip Chapin's Broadside reprinted in Wooden Planes in 19th Century America by Kenneth D. Roberts, 1975


Retooling

Sometimes fate smiles upon you, like when I decided to invest in some saw sharpening equipment. After ten minutes of searching the Internet I found a guy who wanted to unload a whole Foley package for a very very reasonable price. All I had to do was drive to Peoria. Easy enough for a Saturday afternoon.

I'm still a little amazed at how easy that was. The Foley retoother came with carrier bars (separate ones for handsaws and backsaws) and a series of ratcheting bars.  As the machine cycles, a pawl ratchets the carrier forward.  The amount of movement is set by the distance between teeth on the ratchet bar, and adjustment you can make to the pawl.  In this system your ratchet bar is capable of cutting two or three TPI configurations using the same bar.

The trick with getting a retoother is making sure you get the ratchet bars.  I got a pack, probably still in the factory paper, but the finest bar in there was 13 tpi.  Luckily I have Dad's machine shop for when you have a machine shop, you can do cool things.  So I made a 16tpi bar and a custom carrier (the factory ones seemed like major overkill for smaller backsaws).

It took awhile to set up the mill, but much longer to make all of the cuts.  16 passes / in x 20in =320 passes.  I'm glad I didn't make a full sized bar!


Because the ratchet bar was a custom length, I had to make a custom carrier for it too.  The spacing on the arms is not equal and this was done on purpose to allow me to put in smaller blades (remember the Stub-Nose?). 

My carrier and bar on top and factory stock carrier and bar on bottom.

Carrier in the retoother.


Friday, December 30, 2011

Santa's Little Sawmaker

In my annual defiance of America's traditional Yuletide exercise in mass-consumerism, I made all my Christmas gifts.  For grandma -scissors, for mom -small hand shears, for sister -cutting board, for wife -Kindle (we can't all be perfect), for dad -18" tenon saw, for grandpa -8" dovetail saw, for wife's uncle -5" dovetail saw. 
First I'll show you the little dovetail saw, which I started calling the "Stub-Nose .030".  It started from a scrap of .030 plate left over from another saw.  The scrap was nearly the perfect size for a small dovetail saw and with a little shearing it was perfect.  The handle was from some of the flat-sawn maple from the cutting board project.  16 TPI, rip. 

My grandpa does custom cabinetry and carpentry.  Last winter he built me a beautiful toolchest, so I owe him big.  This little dovetail saw has an 8" blade, 16tpi, rip.  Same handle design except done in quartersawn hard maple. 

For my dad I worked up a 18" tenon saw.  The upper one here is my copy of the famous White saw which I still haven't finished -I have to make the special nuts and bolts which will probably be a later post.  The lower saw was my dad's present.  The handle pattern is similar to the design on the White saw except that this design was probably later. In the picture here you can see my dad's saw is not finished either.  When I took this I had just finished letting the blade into the handle.  After this I added the chamfer to the cheeks, installed the split nuts and applied the finish.  I'll try to get some pictures of the completed saw up though it won't look brand new.  Dad has already used it and the handle has picked up some dirt but that's fine by me, I'd rather my saws be used than sit idle.

Up

This is the Cady Tool blog.  At this point I am devoting my time to saw making, though I hope to be able to venture back into other things like chisels, spokeshaves, and planes someday.  The saws made here will be for sale so please contact me if you are interested.